

So, that is my dilemma.
One day, it was not
Thursday but I suddenly had a throwback moment in my college years. I remember,
every Accreditation period I was always
included to stay overnight at the office of Engineering, Arts and Sciences Department
before -- compiling, sorting all reports and documents needed for the said
accreditation of our course, Bachelor of Arts in Communication. We made
tabbing, labeling, putting A.1.1 leaf on pages of every compiled documents.
Pulling out papers from one folder then putting in to another.
Then, it hit me!
What?! How on earth
haven't I thought of that?! Then, it was like a lighted bulb inside my sleeping
head.
I told myself, "That's what I'm going to do. Sort out my
files!"
So, I started from ground
zero.
Folder Labels
 This is for the
cover of the folders.
This is for the
cover of the folders.First, I listed down all the reports for every MIS needed in a sheet of paper: Curriculum MIS, Learner's MIS, Teacher's MIS, Community MIS, Physical Facilities MIS, and Research and Development MIS. Just to see how many folders do I really need and what are the specific names of the folders.
Next, I encoded all those
report titles, still grouped by MIS, in Microsoft Publisher (but can also
be done in Microsoft Word). Each MIS is designed with specific border
design for easy recognition like which MIS is MIS; and which folder is for
this and that MIS.
And of course to put some life and color to the folders. ☺
Then, after encoding all the reports for every MIS. I printed it out. Cut out the titles. Pasted it
on the folder cover.
Below are the soft copies of the folder labels I made.
 This is placed on
the right side of the folder. So, it
will be easy to scan the folders even in side view. The content of this is the same with all in the Folder labels you see above. I encoded them but in different format to be put on the side part of the folder purposely. Some of us would want to organize our folders horizontally. This tabbing will surely be of good help.
I printed it. Cut them all out. Put
scotch tape on top, so it won't get dusty. Pasted it on the side of the folder. Just like how you see on the image.
This is placed on
the right side of the folder. So, it
will be easy to scan the folders even in side view. The content of this is the same with all in the Folder labels you see above. I encoded them but in different format to be put on the side part of the folder purposely. Some of us would want to organize our folders horizontally. This tabbing will surely be of good help.
I printed it. Cut them all out. Put
scotch tape on top, so it won't get dusty. Pasted it on the side of the folder. Just like how you see on the image.
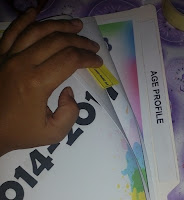
 This is for sorting the content in every folder. See the image below.
I encoded school year title
in a whole blank document. This is
to regroup the data by school year in every report folder. This is the soft copy.
This is for sorting the content in every folder. See the image below.
I encoded school year title
in a whole blank document. This is
to regroup the data by school year in every report folder. This is the soft copy.
I encoded school year in a
leaf tab format. To be pasted on the side of the school year title page.
So that, we can identify which school year for a specific report are we
looking for. To change the school year in the MS Publisher, go to Home > Editing > Replace.
Well, this is really time consuming. All of these are actually. But I don't bother thinking of the hardship. I know it will make my school life more easier.
Glory to be to God!
Below are the soft copies of the folder labels I made.
- Teacher's MIS
- Learner's MIS
- Curriculum MIS
- Community MIS
- Physical Facilities MIS
- Research and Development MIS
Tabbing (MIS reports)
 This is placed on
the right side of the folder. So, it
will be easy to scan the folders even in side view. The content of this is the same with all in the Folder labels you see above. I encoded them but in different format to be put on the side part of the folder purposely. Some of us would want to organize our folders horizontally. This tabbing will surely be of good help.
This is placed on
the right side of the folder. So, it
will be easy to scan the folders even in side view. The content of this is the same with all in the Folder labels you see above. I encoded them but in different format to be put on the side part of the folder purposely. Some of us would want to organize our folders horizontally. This tabbing will surely be of good help.
Leafing
 This is for sorting the content in every folder. See the image below.
Well, this is for the different sub-reports inside a report. Example, in Learners' MIS, we have PHIL-IRI/Reading Profile folder. Inside the PHIL-IRI folder has Oral Reading and Silent Reading sub-reports. For easy tracking, we may put A for Oral Reading then B for Silent Reading.
Well, this is really time consuming. All of these are actually. But I don't bother thinking of the hardship. I know it will make my school life more easier.
Glory to be to God!
